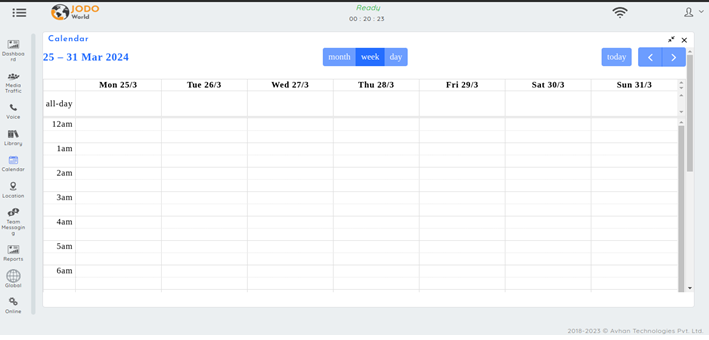
After clicking the calendar icon, the calendar will open up, displaying scheduled events and the current date. Check out different ways to look at your calendar, like by day, week, or month also you can manage events directly within the calendar interface.
To access the calendar, click on the calendar icon in the right hand toolbar.
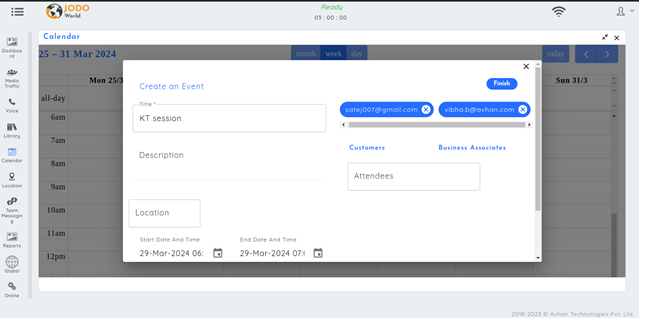
You create an event in the calendar,
Steps:
Select Date/Time: Click on a date or time slot on the calendar where you want to add an event.
Open Add Event Popup: A pop-up window titled “Create an Event” will appear.
Fill Event Details: Enter the event details such as title, description, location, and set reminders as needed.
Select Attendees: Choose attendees from a list of pre-existing business associates. If adding customers, provide their email addresses.
Confirm Event Creation: After filling in the details, click on the “Finish” button to confirm event creation.
Confirmation Emails: Attendees will receive confirmation emails once the event is successfully created.
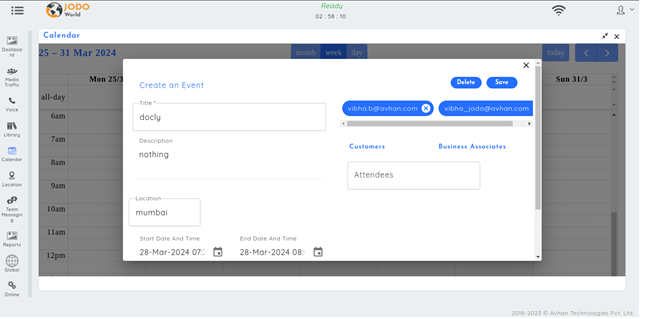
7. Edit or Delete Events: If needed, you can edit or delete events later on.
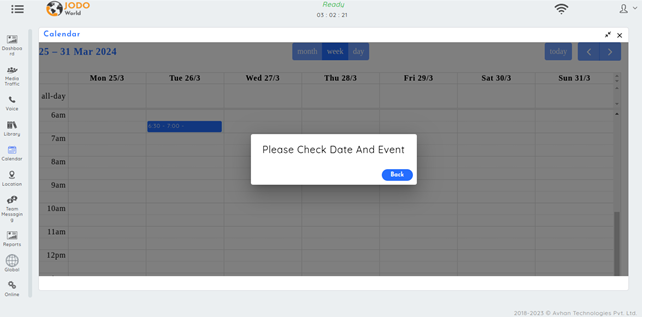
8. Prevent Scheduling in the Past: If you attempt to select a past date or time, a pop-up message will remind you to check the date and time selection.